
Table of Contents
Brewing a stellar cup of espresso is one of the best ways to start the day. The bright crema, the syrupy body, the energy boost—everything you need to wake up on the right side of the bed. Espresso, however, is also hard to brew well.
I’ve put together seven essential recommendations for turning a meh espresso into an Oh Wow shot—if you’re making homemade espresso, you can’t pass these tips up for a perfect shot.
Ready for a better daily espresso shot at home?
What is Espresso?
First things first, we should define what is espresso? Espresso (pronounced “ess-press-oh”) is a shot-sized serving of concentrated coffee, originating in Italy.
It is strong, full-flavored, and packed with caffeine, making it the perfect pick-me-up.
1. Store Your Espresso Beans Properly
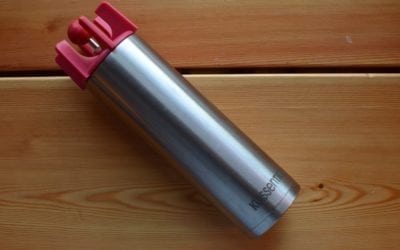
Avoid placing your espresso coffee beans in direct sunlight. You should keep them in a cool, dark place. This will preserve the freshness and flavor for longer.
We suggest using an opaque vacuum container like this one.
You’ll also need to keep your beans dry. When moisture comes into contact with an espresso bean, tiny chemical reactions start to take place (aka, extraction begins when you’re not ready!).
If this happens, the brew will taste bland when you start drinking it.
Once again, get the airtight container!
Also Read: Coffee Bean Storage for Dummies
2. Always Purge Your Espresso Machine
Before you start making coffee, give your machine a quick purge by running hot water through the device.
This will ensure that you are cleaning out any remnants of old coffee grounds, as well as minimizing any leftover oils that might go rancid.
For every 200 cups of caffeine, you will need to do a deeper clean. Some oils and grounds get stuck—like, really stuck—so get you some Urnex Cafiza coffee cleaner and go to town. If you’ve had your machine for a while, you’ll be amazed at the flavor difference!
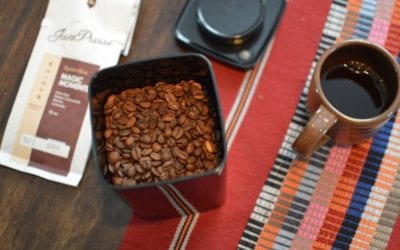
3. It Goes Without Saying, But Get A+ Quality Espresso Beans
No two beans are grown, processed, or roasted alike—there’s a huge array of quality coffee out there (and most of it is not great for espresso).
Always. ALWAYS start with fresh, high-quality coffee.
There are a few signs that you are using high-quality beans.
The most important thing to look for in an espresso roast is the roasting date. Coffee beans don’t exactly “spoil”, but they will start to lose their most nuanced and balanced flavors within 2-3 weeks of roasting.
For espresso, we recommend buying beans that were roasted less than 10 days ago.
This gives the espresso beans just enough time to degass all the CO2 trapped in the cells, but still preserves the best flavors.
Here are a few places to get great beans for espresso:
- Local Specialty Coffee Shops — Coffee shops often have fresh beans on hand. A good sign is when the barista can tell you the origins of the coffee they’re serving (Ethiopia, for example).
- Buying Directly from Roasters Online — Most roasters who sell online roast to order, so you can get uber-fresh coffee by buying direct. Just make sure they’re a reputable roaster known for quality.
- Coffee Subscription — Companies like Trade and Nomad Coffee Club offer recurring coffee subscriptions from dozens of regions and farmers, so you have hundreds of beans to choose from each month.
For more info, read: How to Find High-Quality Coffee Beans
4. Grind the Beans Carefully
You’ll get the best flavor by purchasing whole beans, then using a burr grinder to achieve a finely ground coffee right before you brew.
If the grind is too fine, it will produce a harsh, bitter taste. However, if the ground coffee is too coarse, the water will slide past the beans without extracting the delicious flavor you’re after.
This will produce a weak and watery brew.
In fact, the difference between “too fine” and “too coarse” is so small, you can hardly feel it with your fingers—but the way it impacts the flavor of your shot is unmistakable.
That’s why everyone, from pros to regular Joes, suggests a dedicated espresso grinder that has “micro-adjustments” that can make these extremely small grind setting changes effectively (most grinders only have “macro” adjustments).
It’ll take some experimentation—it’s natural. Just try changing the settings ever so slightly a couple of times until you get the shot flavor you’re looking for.
5. Get the Right Dose Size (Brewing Ratios Can Be Hard)
The general rule of thumb is to leverage a 1:2 coffee to yield ratio when brewing espresso. Essentially, for every 1 gram of finely ground coffee, you want 2 milliliters of espresso in your final cup. Let’s see the match…
- 15g ground coffee = 30ml total shot
- 20g ground coffee = 40ml total shot
You can tweak the grind, of course, to customize your flavor.
- More grounds per total shot means you get a higher concentration of flavor
- Less grounds per total shot means you get a somewhat smoother, more balanced brewed coffee
Play around with it and find the extract ratios you like.
Also Read: Brewing Ratios for Dummies
6. Tamp Evenly
When you have placed the grounds into the portafilter basket, they will be uneven.
This is why the tamping process is so important. It will remove any air pockets from the grounds.
There is no hard and fast rule about how much force you should use when tamping (though some folks swear by 30 pounds of pressure). The most important part is to be consistent. If you’re putting 10 lbs of pressure on one day, then 25 lbs the next, your espresso will pull differently—and that’s super frustrating.
Don’t forget to wipe off the tamp, especially if you are using different coffee blends.
7. Consider a Manual Espresso Machine (Skip the Super-Automatic)
Finally, we suggest exploring an espresso maker that gives you control over your espresso. An automatic or “super-automatic” espresso maker will typically leave you with only 1-3 preset recipes.
If you want to use more beans, pull a larger total shot, or tamp differently… you’re out of luck with a super-automatic coffee maker.
At first, it can be a bit difficult to learn how to use a manual machine—the journey is part of the fun! But after a few cups, you’ll get the hang of it. It’s a lot more fun to make the java yourself than simply hitting a button.
An additional option is the moka pot – which is a bit smaller than your typical coffee maker. They take up very little counter space, and can be used on all types of stoves and with all types of cooktops. The downside with a stovetop espresso maker is that they take a bit longer to make your coffee or espresso than other types of coffee makers do, and that you must clean them by hand. But otherwise, a moka pot works great!
There’s a lot of pride in making something by your own hand and skill. Plus, these machines look cool on your kitchen counter, showing people that you have barista skills.
If you want to learn more about espresso machine options, check out this guide.
How to Drink Espresso
Now that you know how to make authentic espresso at home, you need to know how to properly enjoy it.
Sure, you could down it in one, er, shot, but to properly appreciate and savor its flavors, as well as respect the technique put into its creation, follow the simple steps below.
Step 1: Cleanse Your Palette
When you cleanse your palette, you eat or drink a neutral-flavored food or drink that will serve to remove any lingering flavors from your mouth. This will allow you to enjoy the next thing you eat or drink from a fresh perspective.
Depending on where you are making or ordering your espresso, your barista may provide you with a small bottle or glass of still or sparkling water before making or serving your espresso.
While this won’t happen in a large chain or local shop (who may be concerned about profit margins), it does tend to happen in more traditional establishments.
Step 2: Sitting vs. Standing
Now, it’s time to decide your stance.
Traditionally – and this is still practiced in Italy – people will drink espressos standing up at the kitchen counter or bar. This is a fast beverage that doesn’t take too long to drink.
Drinking your espresso in this way can also save you money, as Italian coffee bars tend to double the price of your beverage if you decide to drink your coffee sitting down at a table.
However, if you want to rest your legs, or if drinking espresso in other locations, it is equally as acceptable to drink your espresso seated at a table.
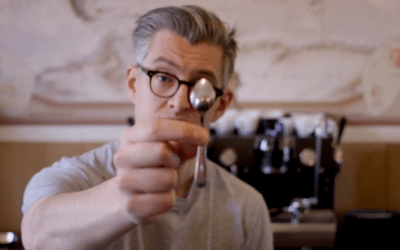
Step 3: Decide Whether You Want the Crema
The “crema” on your espresso is the light, thin layer of foam that sits on its surface.
When ground coffee comes into contact with hot water during the process of making your espresso, it will release small bubbles of carbon dioxide. Initially, these bubbles are suspended in the water of the drink, but as pressure is applied during the brewing process, the bubbles attach to the ground coffee’s natural oils and fats and rise to the surface of the drink.
Whether you drink the crema or not will depend on personal preference. Crema, itself, tastes very bitter.
While some people enjoy it and consider it part of the espresso experience, the vast majority of people do prefer to remove it rather than consuming it. Removing the crema also doesn’t take away from the flavor or texture of the espresso itself, meaning you don’t lose anything by disposing of it.
If you wish to remove the crema, simply use a teaspoon to scrape it from the surface. You can usually place it on a napkin, which can then be thrown away.
If this is your first time drinking espresso, why not try two?
You can try one with the crema and one without (using a palette cleanser in between) to determine which you like best.
Step 4: Decide Whether You Want to Stir
Once you’ve decided what to do with your crema, you can stir your espresso. Again, this is a point of personal preference.
Espresso tends to separate shortly after it has been brewed, with the heavier elements of the drink sinking to the bottom and lighter elements rising to the top.
Traditionally, people wouldn’t have stirred their espressos, instead, simply drank it as served. People who choose to avoid stirring tend to enjoy tasting the different elements of the espresso separately, with the differences in flavor and texture between the first and last sip being gradual.
Those who prefer to stir their espresso generally prefer a more consistent drink with a well-balanced flavor and texture throughout.
Again, it’s worth trying both stirred and unstirred espresso to determine which you like best. If you decide to stir, simply use a fresh teaspoon to gently stir the small drink until the liquid appears even.
Step 5: Drink Your Espresso
Now that all of the prep work has been completed, it’s time to drink your espresso.
There are different ways to drink an espresso shot and – (are you noticing a trend yet?) – you will have to try both ways to figure out which ticks your boxes.
If you want your espresso to be a fast, pick-me-up, you can drink it quickly. This can be in one shot or a couple of sips, allowing you to enjoy the hot drink before it cools.
If you want to savor and appreciate all the different notes and complex flavors of the espresso, making this more of an experience, you can take your time, taking small sips.
Make sure that each sip completely covers your tongue for maximum flavor.
Bottom Line on How to Make Espresso at Home
Making an exceptional espresso at home shouldn’t be difficult. With a few simple changes, you’ll be able to make a café quality blend.
So, try these tips to make the perfect cup of espresso coffee at home.


0 Comments